This post is brought to you by Us Weekly’s Shop With Us team. The Shop With Us team aims to highlight products and services our readers might find interesting and useful, such as wedding-guest outfits, purses, plus-size swimsuits, women's sneakers, bridal shapewear, and perfect gift ideas for everyone in your life. Product and service selection, however, is in no way intended to constitute an endorsement by either Us Weekly or of any celebrity mentioned in the post.
The Shop With Us team may receive products free of charge from manufacturers to test. In addition, Us Weekly receives compensation from the manufacturer of the products we write about when you click on a link and then purchase the product featured in an article. This does not drive our decision as to whether or not a product or service is featured or recommended. Shop With Us operates independently from the advertising sales team. We welcome your feedback at ShopWithUs@usmagazine.com. Happy shopping!
Sponsored content. Us Weekly receives compensation for this article as well as for purchases made when you click on a link and buy something below.
Why do Brussels sprouts get such a bad rap? Sure, most kids try to avoid every type of vegetable, but we pretty much all move past that as we grow up, finding the joy in eating healthy essentials like broccoli, carrots and peas. Brussels sprouts, however, sometimes have trouble making that leap from scary vegetable to delicious side. But the problem doesn’t necessarily lie within the green itself.
We believe Brussels sprouts are actually one of the best-tasting vegetables out there…as long as you prepare them correctly. It’s easier to understand people’s aversion to the veggie when you consider how many they’ve probably tried that were too mushy, too firm or not well-seasoned. It’s all about the prep, even starting from the cookware itself. We’ve rounded up five simple steps you can follow to prepare the most mouthwatering Brussels sprouts ever, from the pan to the herbs!
Step 1: Find the Perfect Pan
We’ve made this step easy for you, because we already found it. We knew Calphalon was the way to go for a perfect pan, and this 10-inch beauty has got it all going on and so much more. One of the coolest things about it is its oil-infused ceramic coating. With a pan like this, you can totally skip the oil, butter and the extra calories that come along with them. This coating is also nonstick, allowing for the food to release more easily for quicker cleanup and longer-lasting performance. One reviewer said it “literally takes seconds to clean”!
This pan also has a long comfort-grip silicone handle that stays cool as you sauté, so you won’t need an oven mitt. If you do ever need to pop it in the oven though, you can! It’s oven-safe up to 400 degrees. As for the stovetop, it’s good to go for gas, electric, halogen and glass ranges. It comes with a limited five-year warranty too, so you really can’t go wrong here. Shoppers say this is something they “would recommend to anyone,” and now we’re recommending it to you!
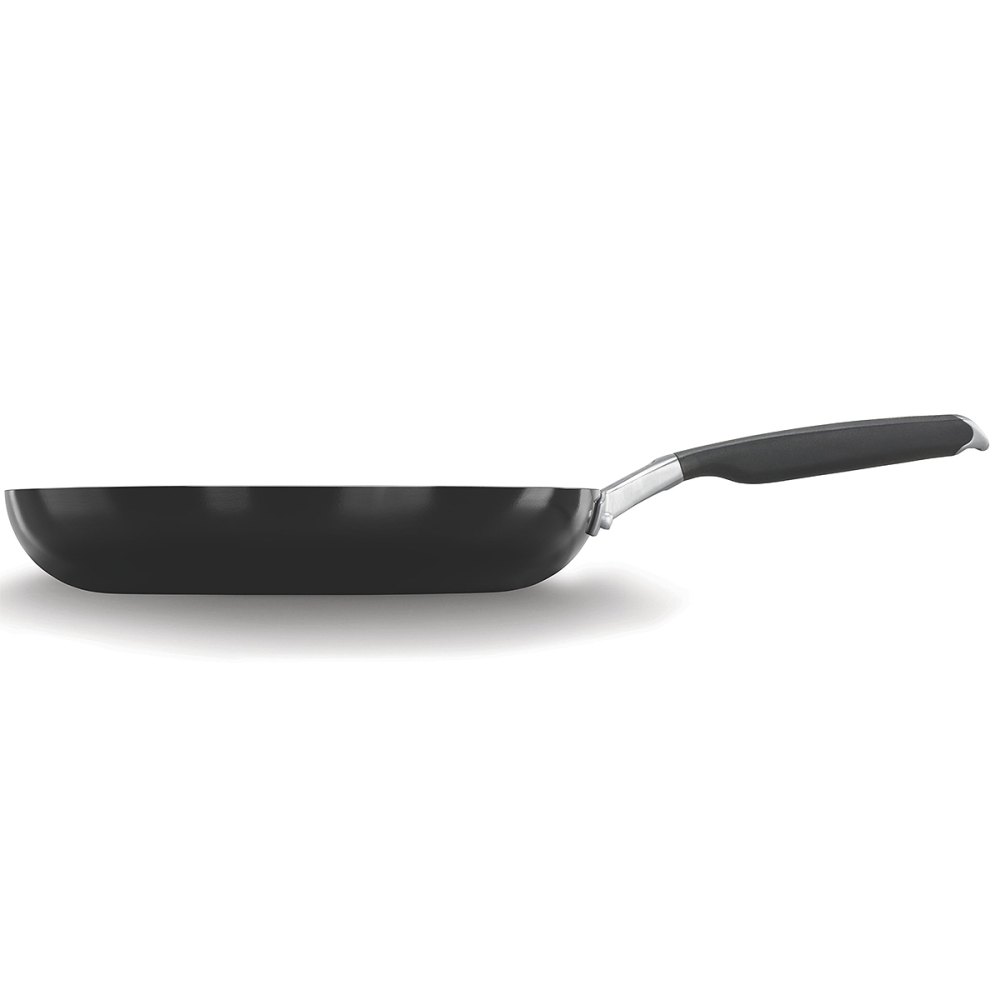
Get the Select by Calphalon™ Oil-Infused Ceramic 12-Inch Fry Pan for just $40 at Calphalon with free shipping!
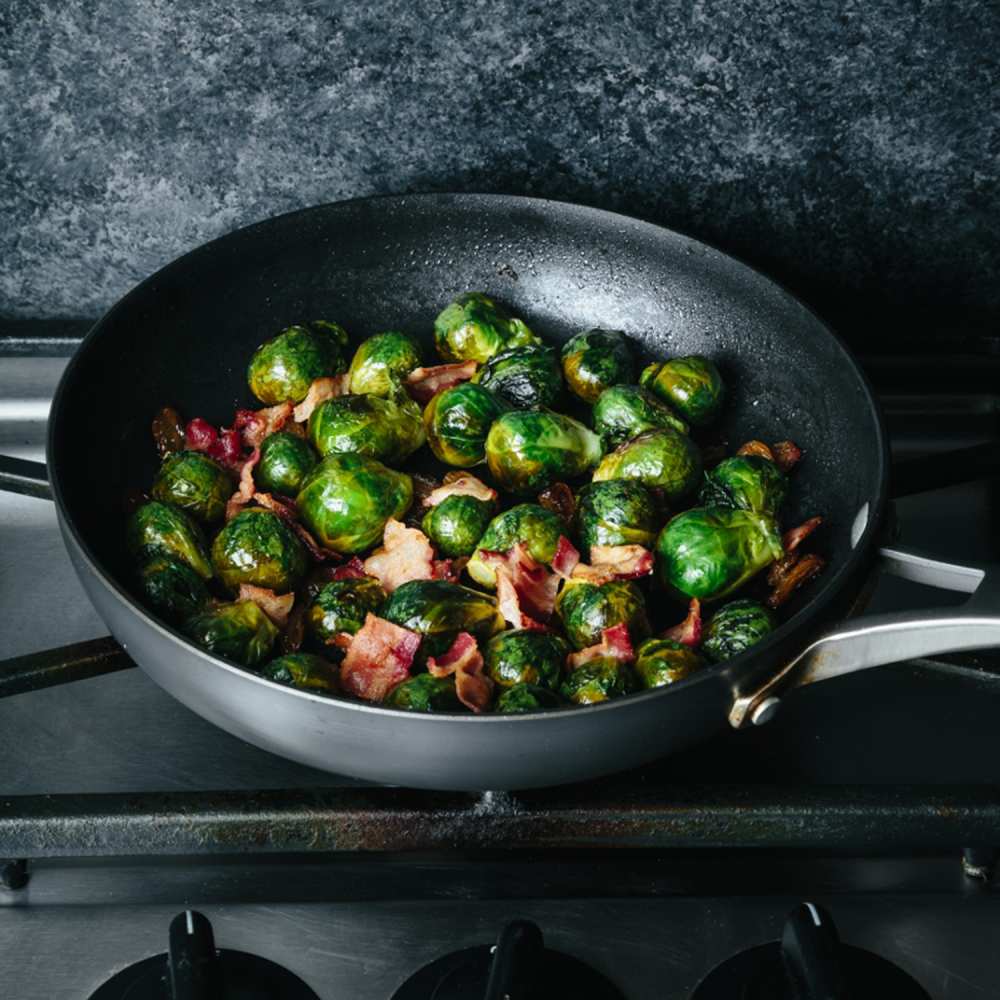
Step 2: Prepare the Brussels Sprouts
Prepping your sprouts is extremely important, as with any vegetable. Make sure to wash them and trim off the ends, removing any damaged leaves along the way. Then, cut each one in half so each piece can really suck up the seasoning you’ll add later — and so they’re bite-size!
Step 3: Add Brussels Spouts to Your Pan
Remember, if you’re using your oil-infused Calphalon pan, you can skip adding extra oil here. Place your prepped Brussels sprouts right in, and then…just wait. Leave them until they start to caramelize. Pretty easy step!
Step 4: Season
Once the sprouts have begun to caramelize, it’s time to add the salt and pepper. Feel free to also be creative if you want, perhaps by adding garlic powder or onion salt. You can just keep it simple with the basics though, and you’ll still be thrilled with the results. Stir the seasoned veggies until they turn a golden brown. This should take probably at least 5 minutes, but under 10!
Step 5: Remove From Heat and Add Toppings
Once your sprouts have browned, remove the pan from heat and plate the sprouts. Then it’s time to really bring out and complement the flavor. Try adding some freshly-squeezed lemon juice or some vinegar, and don’t forget the grated cheese if you’re a fan. You could also try anything from crispy bacon for some yummy texture to herbs like basil, chives, parsley or thyme. You can try sprinkling with nuts too! Now, enjoy!
Extra Tips:
These are just some simple steps you can follow to ensure a delicious batch of sprouts. You can always get even more creative too. Try roasting the sprouts with maple syrup in the same Calphalon pan. You can also use the same pan if you need to reheat leftovers. The microwave works too, of course, though the texture might falter a bit. For storing leftovers, just make sure to tightly seal them in a container in the fridge, and eat them within the next three or four days. And then you can make them again and again. You’ll probably want to!

Check out more of our picks and deals here!